


Here we will explain step by step, how you can upload your own images and start working on your first case.
Step 1: Exporting your images
Instructions for Windows
To upload our pictures we need them in either DICOM or JPG/JPEG format. If you already have this you can skip this step.
In this example we will be using RadiAnt DICOM Viewer to demonstrate exporting of images, however you can use any DICOM viewer of your choice.
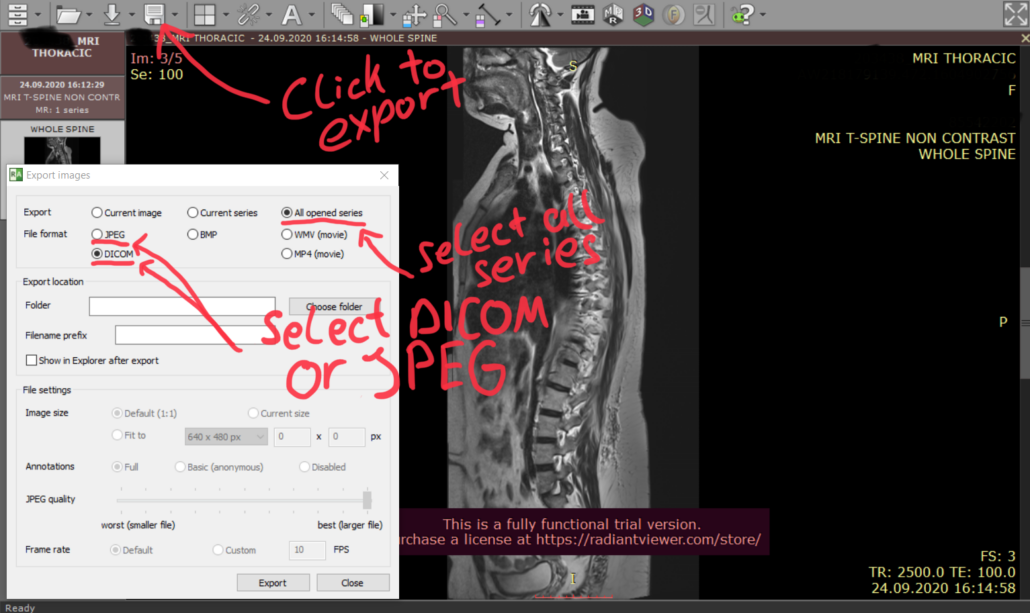
Export:
- Open your images in your preferred DICOM-Viewer
- Edit them until you are satisfied
- Select the export option and choose DICOM or JPEG/JPG as desired format
Compressing to zipped folder:
- After your files are exported, locate them in your file explorer
- Press and hold (or right-click) the uppermost exported folder, select (or point to) Send to, and then select Compressed (zipped) folder
- A new zipped folder with the same name is created in the same location

Instructions for Mac
To upload our pictures we need them in either DICOM or JPG/JPEG format. If you already have this you can skip this step.
In this example we will be using Horos DICOM Viewer to demonstrate exporting of images, however you can use any DICOM viewer of your choice.
Export:
- Open your images in your preferred DICOM-Viewer
- Edit them until you are satisfied
- Select the export option and choose DICOM or JPEG/JPG as desired format

Compressing to zipped folder:
- After your files are exported, locate them in your file explorer
- Right-click or control-click on the file to bring up the pop-up menu
- Select Compress filename
- The Mac will begin to compress the file or folder you’ve selected. Once it’s done, you’ll find a filename that ends in .zip right next to the file you selected

Step 2: Adding a case to the database
- Please open cases.berlincaseviewer.com and log in
- Make sure you now have the “Cases” tab selected at the top
- Here we can see an overview of all the available cases on the website. In order to create your own case and add it to the database, press the plus button at the top right
- You will then be prompted to input a case title and a suitable category
There is a given preset of categorys at the moment. If there is no perfectly suitable category for your case, try to choose a more general one.
Step 3: Uploading your images
In order to upload your images, simply press the “Add Files”-button or drag and drop your files in the container. Your Files should be in the DICOM- or JPEG/JPG-Format and inside a ZIP-Compressed Folder. If you are not sure how to achieve this, please read Step 1.
Please only select one ZIP-Compressed folder and then press the “Start Upload”-button.
Once the upload is complete you can close the dialog windows and should now see your images in the “Series” area.
If you want to upload additional images later, simply press the “Series-upload”-button at the top and the dialog should reappear.
If you encounter a problem trying to upload your files, you can try the following:
- Make sure you have the correct files in your uploaded folder (Folder name like xyz.zip and each image file in the folder or one of the subfolders is either a DICOM or a JPEG/JPG image)
- If you tried to upload DICOM images, try to upload JPEG/JPG images instead
- Export you files again from your image viewer and check the settings there
- If the problem persists feel free to contact us and ask for help