


Thanks for considering contributing cases or case modules to BerlinCaseViewer!
Here you will find a briefing on how our cases are structured. Further down you will find instructions on how to enter your cases and present them on our platform.
The structure of the cases
You need at least the below information if you want to enter a case in BerlinCaseViewer:
- A brief history (approx. 30-35 characters)
- Age
- Gender
- Case history (text as paragraph or bullet points)
- Diagnosis (max. 250 characters)
- Case description (at least 3 sentences, more are welcome)
- Images, of course
Optionally, the following items can be added:
- Clinical findings
- Laboratory values
- Overlays (they are the core of our cases and some overlays should be created in any case)
- Learning points/learning pearls
- Multiple choice questions (at least one question per case would be ideal to provide possible differential diagnoses to the user to think about)
Now see for yourself how it all plays together!
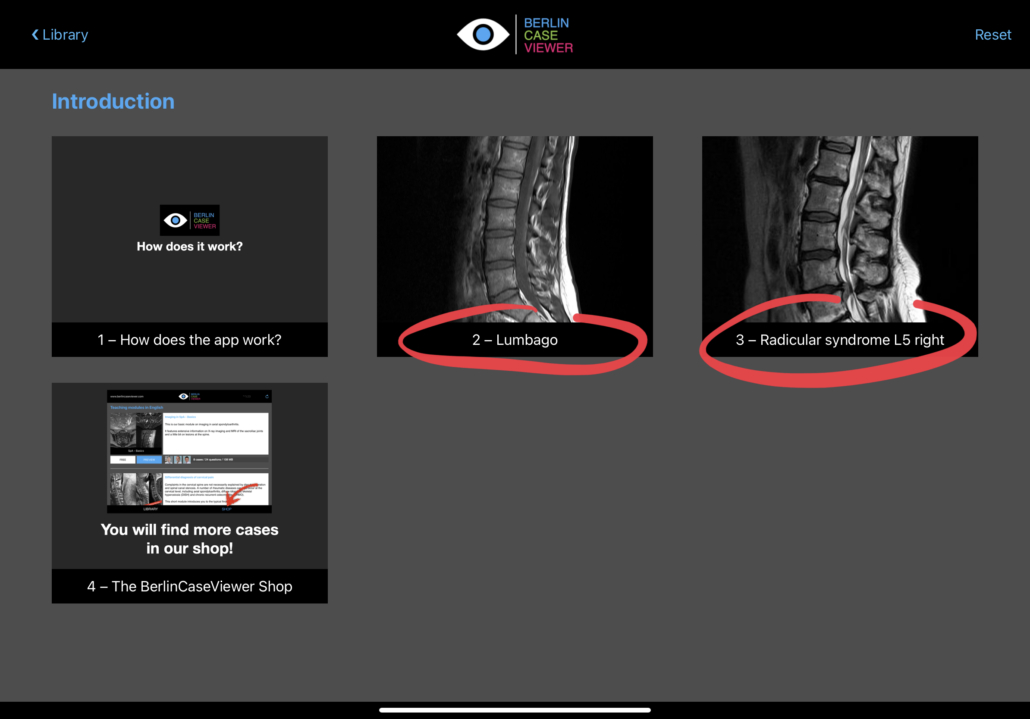
Here you can see how we use the brief history. It is used as a short description even if you haven’t opened the case (red circle).
The same brief history is presented as the title of the case when it is opened (red circle). Case numbers are assigned automatically. Case history, age, and gender are presented in an info popover (blue line).
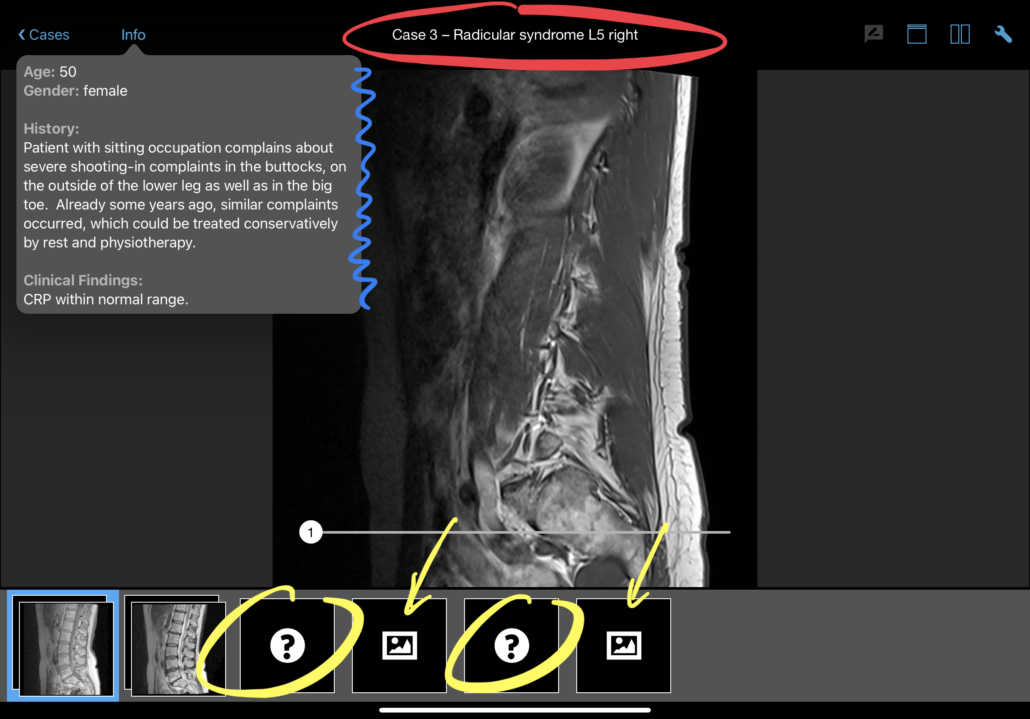
Please note the use of multiple-choice questions (yellow circles) as they interact with the case. Unanswered questions are blocking all items further right of them (yellow arrows), thus questions need to be answered before the user can proceed.
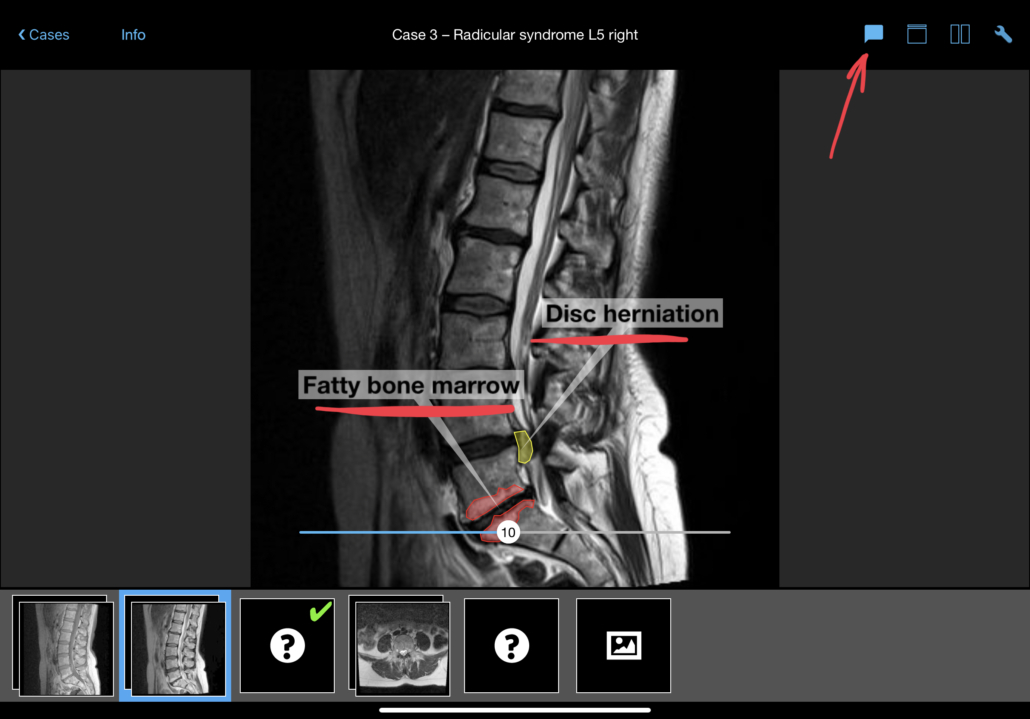
After answering a question, it gets marked with a green checkbox or a red cross. The user can tap on the question and will receive feedback on which answer would have been correct.
After answering questions, the user can now also display overlays and study the findings in the image in detail. For this purpose, there is a blue overlay button in the toolbar at the top right (red arrow). If it is activated, the colored overlays and their labels are displayed directly on the images (red markers). To be honest, to create these overlays is the most time consuming part of the case authoring process.
Note that in this example the second question has not yet been answered and therefore the last block in the bottom bar is not yet active.
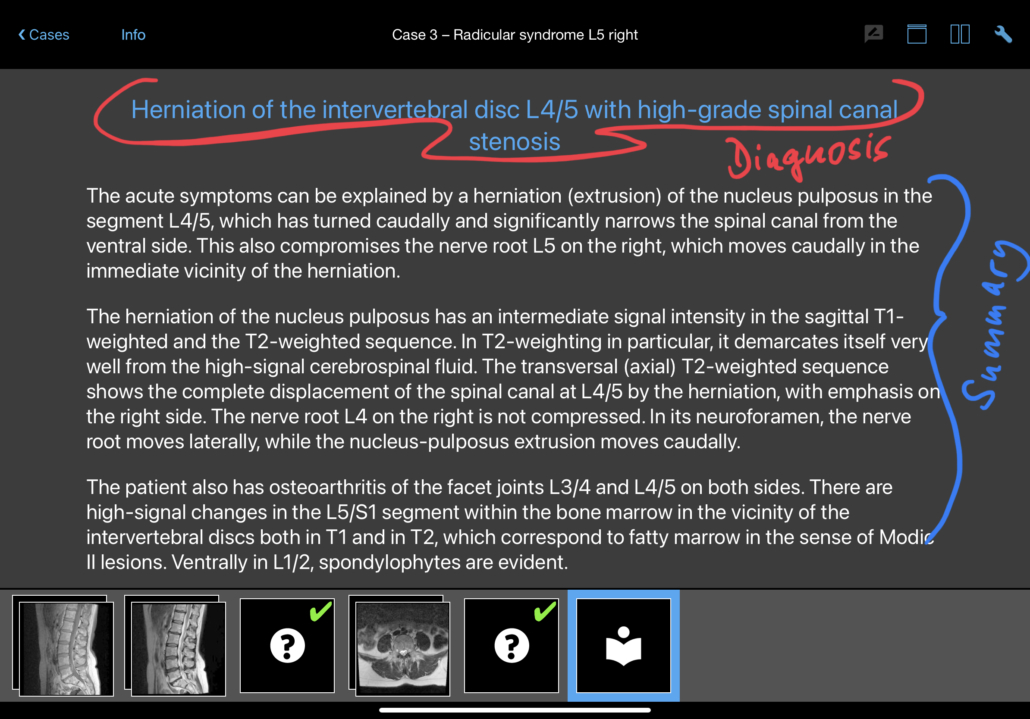
In the last block, the diagnosis is finally presented (red marking). This is also the place for the summary of the case in text form (blue marking). In this example, it is quite detailed, but this is not necessary for every case. Generally, there should always be a learning for the user and it should be clearly communicated.
Optionally, you can add a block of learning points to the summary. Users love short bullet points about the case, which are easy to remember.
Okay, now it’s your turn! Do you feel like adding your own cases to our collection? On the next page, you will see how to enter the data step by step.
Click here to learn how to enter and edit our cases step by step!